reversible aprons for good friends, with quilting cottons that to me speak of these friends' personalities. Let's see what they say.
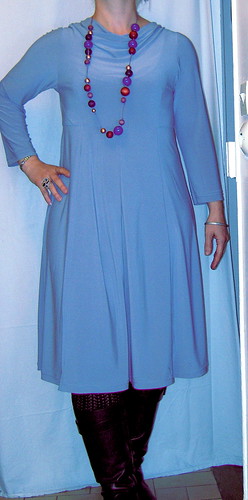
Of course, now that I look at the pics, it becomes obvious to me what's wrong with the pattern: empire waistline with ties that tie in front? Well, hello, that cannot possibly work. And as the pics show, it doesn't. Oh well, live and learn.
I modified the pattern to have only one long continues tie made from bias band: and included contrast bands at the side of the bodice, making a tunnel for the ties. That part worked quite well. AS to the empire waist: ah well, let that be for another time. By the time I have included all my modifications into this pattern, it's not a modified pattern but my own pattern all together. Never mind, I still think the aprons are neat, and pretty, and usable on both sides.

a child's version -- with no waist, and thus better-fitting. And knee-high socks for my son, as he loves these, and his last two pairs became too small more than a year ago.